Jekyll is a simple, blog-aware, static site generator. It takes a template directory containing raw text files in various formats, runs it through converters like Markdown and Liquid, and spits out a complete, ready-to-publish static website for your favorite web server.
Jekyll also happens to be the engine behind GitHub Pages, which means you can host your project’s page, blog, or website from GitHub’s servers for free. Rawr!!!
Install Jekyll#
Before you start, make sure that Ruby and the DevKit are installed on your Windows machine. Also check the Jekyll version GitHub Pages is running. Currently that’s version 1.0.3.
Open PowerShell (Windows Key + R and type powershell) and install Jekyll by running the command gem install jekyll -v 1.0.3.
PS > gem install jekyll -v 1.0.3
Fetching: jekyll-1.0.3.gem (100%)
Successfully installed jekyll-1.0.3
1 gem installed
Installing ri documentation for jekyll-1.0.3...
Installing RDoc documentation for jekyll-1.0.3...
Create GitHub repository#
Open GitHub and create a new repository named username.github.io. Note that username must be your own account’s username or Pages will not build. Make sure you don’t initialize your repository with a README file.

Next change to your desired working directory (e.g cd D:\Work) and clone your new GitHub repository locally git clone https://github.com/martinbuberl/martinbuberl.github.io.git.
PS > cd D:\Work
PS D:\Work> git clone https://github.com/martinbuberl/martinbuberl.github.io.git
Cloning into 'martinbuberl.github.io.git'...
warning: You appear to have cloned an empty repository.
Create Jekyll site#
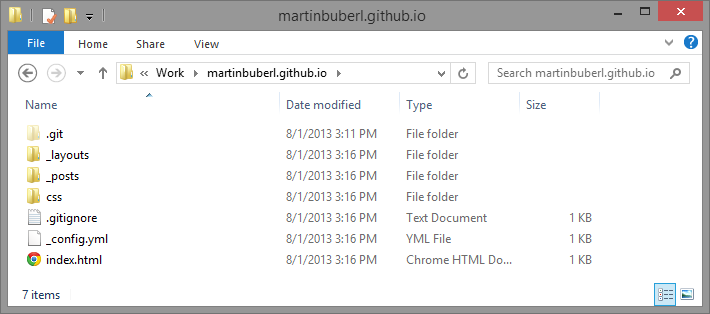
To create a new Jekyll site in your repository directory run the command jekyll new martinbuberl.github.io.
PS > cd D:\Work
PS D:\Work> jekyll new martinbuberl.github.io
New jekyll site installed in D:/Work/martinbuberl.github.io.

Next open the file _config.yml and change the line pygments: true to pygments: false. Pygments is a Python syntax highlighter and for the sake of simplicity we’ll ignore it for now.
name: Your New Jekyll Site
pygments: false
Run Jekyll locally#
Head back to PowerShell and switch to your repository directory where you just installed Jekyll cd D:\Work\martinbuberl.github.io. Run the command jekyll serve. This will generate your static site into the folder _site and start Jekyll’s built in server.
PS > cd D:\Work\martinbuberl.github.io
PS D:\Work\martinbuberl.github.io> jekyll serve
Configuration file: D:/Work/martinbuberl.github.io/_config.yml
            Source: D:/Work/martinbuberl.github.io
       Destination: D:/Work/martinbuberl.github.io/_site
      Generating... done.
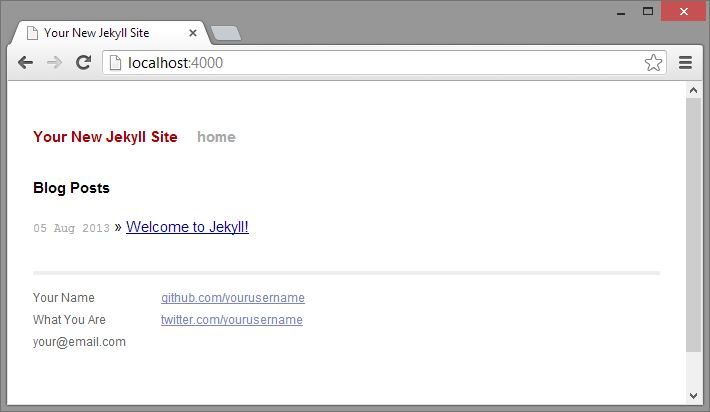
Now open a browser, go to http://localhost:4000/ and check out your new Jekyll site running locally. Note that you can stop the server at any time with Ctrl + C.

Publish Jekyll on GitHub Pages#
Switch to your repository directory cd D:\Work\martinbuberl.github.io and run the Git commands to add git add --all, commit git commit -m "Initial commit" and push everything to your GitHub’s repository master branch git push "origin" master:master.
PS > cd D:\Work\martinbuberl.github.io
PS D:\Work\martinbuberl.github.io> git add --all
PS D:\Work\martinbuberl.github.io> git commit -m "Initial commit"
[master (root-commit) 814bfad] Initial commit
 8 files changed, 320 insertions(+)
 create mode 100644 .gitignore
 create mode 100644 _config.yml
 create mode 100644 _layouts/default.html
 create mode 100644 _layouts/post.html
 create mode 100644 _posts/2013-08-05-welcome-to-jekyll.markdown
 create mode 100644 css/main.css
 create mode 100644 css/syntax.css
 create mode 100644 index.html
PS D:\Work\martinbuberl.github.io> git push "origin" master:master
Counting objects: 13, done.
Delta compression using up to 4 threads.
Compressing objects: 100% (11/11), done.
Writing objects: 100% (13/13), 3.42 KiB, done.
Total 13 (delta 0), reused 0 (delta 0)
To https://github.com/martinbuberl/martinbuberl.github.io
 * [new branch]      master -> master
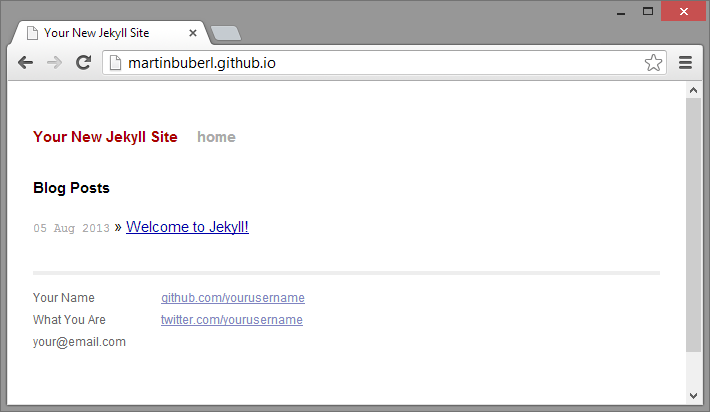
That’s it! Open your browser, go to http://martinbuberl.github.io/ and check out your new Jekyll site hosted on GitHub Pages. Note that you may have to wait up to 10 minutes before the content is available and you can reach your site at the respective URL.

Setting up a custom domain#
Let’s say you own the domain martinbuberl.com and would like to use it for your GitHub Pages. All you have to do are two easy steps to tell GitHub’s server to serve from this domain.
First create a file named CNAME in the root of your repository and put the domain in it:
martinbuberl.com
Next change the DNS settings for your domain so that its A records are pointing to the IP addresses 192.30.252.153 and 192.30.252.154. Piece of cake.
It may take a while until the changes are propagated through the DNS system. You can check the status of the A record using NSlookup:
PS > nslookup -type=A martinbuberl.com
Server: Unknown
Address: 192.168.0.1

Non-authoritative answer:
Name:    martinbuberl.com
Addresses:  192.30.252.153
          192.30.252.154
Apex domains#
Note that GitHub recommends using a custom subdomain instead of an apex (or naked) domain for your GitHub Pages site.
While the solution above using A records is working in general for apex domains - it can cause redirect issues - resulting in slow load times.
Personally, I ended up using DNSimple which supports ALIAS records to be able using an apex domain without the hiccups.
Keeping Jekyll up to date#
As GitHub Pages updates Jekyll from time to time, your version may become out of date, resulting in your site appearing differently locally than it does when published.
To keep Jekyll up to date, you can compare their version occasionally to yours jekyll -v and install a newer one by running the command gem install jekyll -v x.x.x again.
