Ubuntu is an operating system based on Linux and is distributed as free and open source software. Amazon Elastic Compute Cloud (EC2) is part of Amazon.com’s cloud computing platform, Amazon Web Services (AWS). EC2 allows you to rent virtual computers on which to run your own applications.
If you don’t already have an AWS account, go ahead and sign up. Amazon offers a Free Usage Tier to get you started in the cloud, which includes 750 hours of Linux Micro Instances on EC2 each month for one year.
Create EC2 instance#
Once you signed in, open the EC2 Management Console, go to Instances and select Launch Instance. Choose the Classic Wizard and select Ubuntu Server 13.04 as 64-bit version. Provide your desired Instance details. For this tutorial you can just stick with the default settings (Number of Instances: 1, Instance Type: T1 Micro, Availability Zone: No Preference) and skip Advanced Instance Options, Storage Device Configuration and Key/Value Pairs (unless of course you want to edit these settings).
At the step Create Key Pair enter a name for your new key pair (e.g. ec2-martinbuberl) and click Create and download your Key Pair. A file named ec2-martinbuberl.pem should start to download. Save this file to a folder of your choice (e.g. D:\App\EC2). You will need it later to connect to your EC2 instance via SSH.
Next create a new Security Group. Enter a group name and a group description (e.g. http-server). Create and add a new rule for HTTP. You should now have 2 rules in place:
| Port (Service) | Source |
|---|---|
22 (SSH) |
0.0.0.0/0 |
80 (HTTP) |
0.0.0.0/0 |
Review the information and click Launch. You should get a confirmation “Your instances are now launching”. It might take a few minutes until the instance is completely available, so go grab a coffee.
Setup Elastic IP address#
An Elastic IP address is a static IP address designed for dynamic cloud computing. We wouldn’t necessarily need it for this tutorial but it’s nice to have and easy to setup.
In the EC2 Management Console, go to the Network & Security group and choose Elastic IPs. Allocate a new IP address and Associate it with your new EC2 instance. It might take a minute or two until your instance is reachable under that new IP address.
Connect to Ubuntu via SSH on Windows#
To connect to your EC2 instance you’ll need a Secure Shell (SSH) client for Windows. There are a bunch of different clients out there, but the most popular one is probably PuTTY.
So go ahead and download the PuTTY putty.exe and the PuTTYgen puttygen.exe binaries for Windows on Intel x86 and save them together with your key pair file you created earlier ec2-martinbuberl.pem.
Convert your private key#
PuTTY does not natively support the private key format .pem generated by Amazon EC2 but has a tool called PuTTYgen, which can convert keys to the required PuTTY format .ppk. You must convert your private key into this format .ppk before you can connect to your instance using PuTTY.
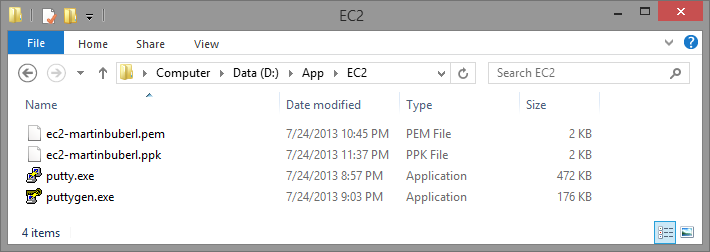
To do that, open PuTTYgen and Load the existing private key file that you want to convert (e.g. ec2-martinbuberl.pem). Click Save private key to save it in PuTTY’s file format. PuTTYgen asks if you want to save the key without a passphrase. Click Yes, choose a filename (e.g. ec2-martinbuberl.ppk) and save the private key with the other files. If you followed everything to the point you should now have the following 4 files in your D:\App\EC2 folder :

Connect using PuTTY#
Open PuTTY putty.exe and enter the IP address we associated earlier (for me that’s 23.21.118.110) as the Host Name (or IP address). Note that alternatively you could also use the Public DNS which will be something like ec2-23-21-118-110.compute-1.amazonaws.com.

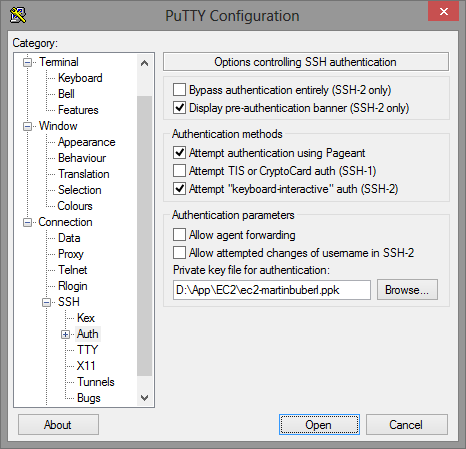
Next under the category Connection, expand the SSH node, and select Auth. Under Authentication parameters click Browse… and select your PuTTY private key file .ppk.

It’s a good idea to save this session for future use. To to that, go back to the Session category, enter a name for the session in Saved Sessions (e.g. Ubuntu EC2) and click Save.
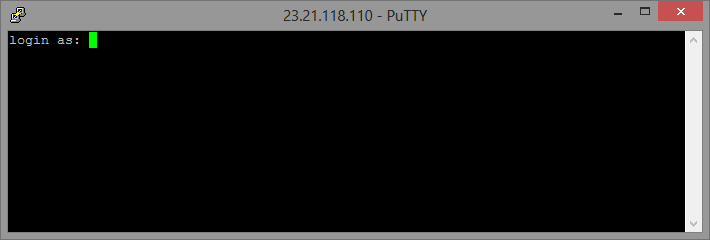
Now click Open. If this is the first time you have connected to this instance, a security alert dialog box will be displayed asking if you trust the host you are connecting to. Click Yes. You should now see a console type window asking to login as.

Login by typing the username ubuntu, and if successful you should get a wall of text and are now connected to Ubuntu running in the cloud on Amazon EC2 via SSH.

